

Image Credit: David Goodyear
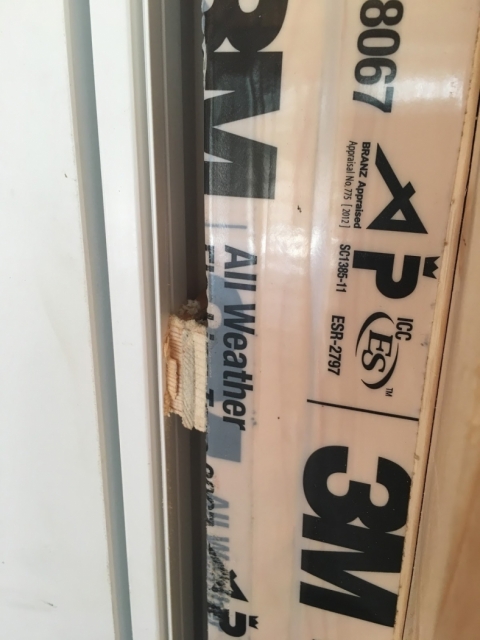
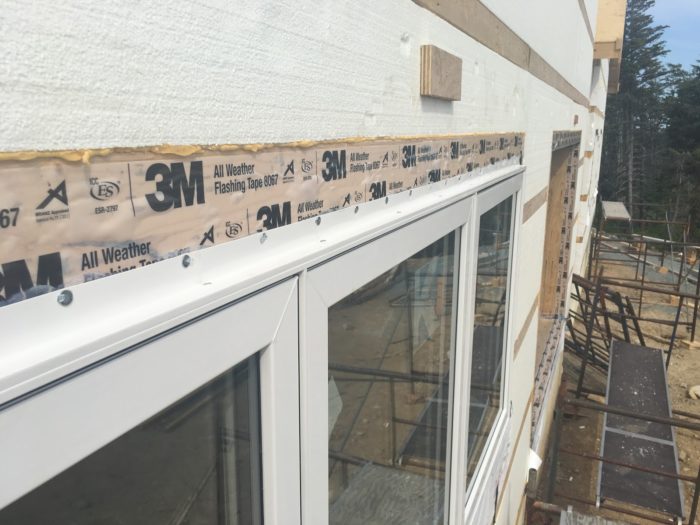
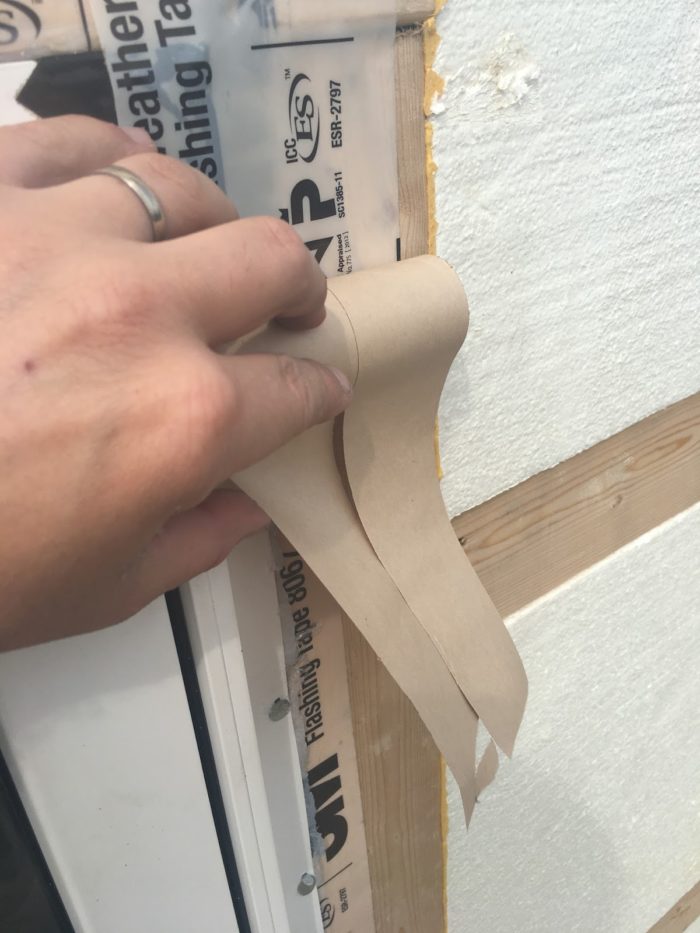
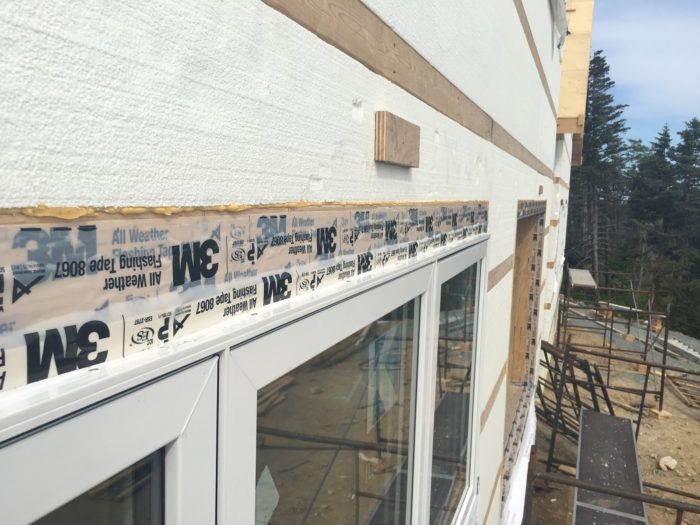
Image Credit: David Goodyear The window flanges were attached with 1 1/2-inch roofing nails. Silicone caulk squeeze-out is visible in places just above the flange at the head of the window. The 3M flashing tape above the window was applied in a previous step and will provide a good base for the next layer of flashing tape. It takes practice to apply the split-back tape smoothly. The author begins by cutting pieces about 8 inches longer than the jamb, and rolling it up tightly. After peeling back a few inches of backing, he begins applying it to the flange. The flange at the head of the window is now completely sealed with silicone caulk and a layer of 3M flashing tape. A drip cap will come later, and the weather-resistant barrier will be taped to it. The Kohltech entry doors have three-point locking system that ensures a snug, draft-free fit.
More Guest Blogs


Editor’s Note: This is one of a series of blogs by David Goodyear describing the construction of his new home in Flatrock, Newfoundland, the first in the province built to the Passive House standard. The first installment of the GBA blog series was titled An Introduction to the Flatrock Passive House. For a list of Goodyear’s earlier blogs on this site, see the “Related Articles” sidebar below; you’ll find his complete blog here.
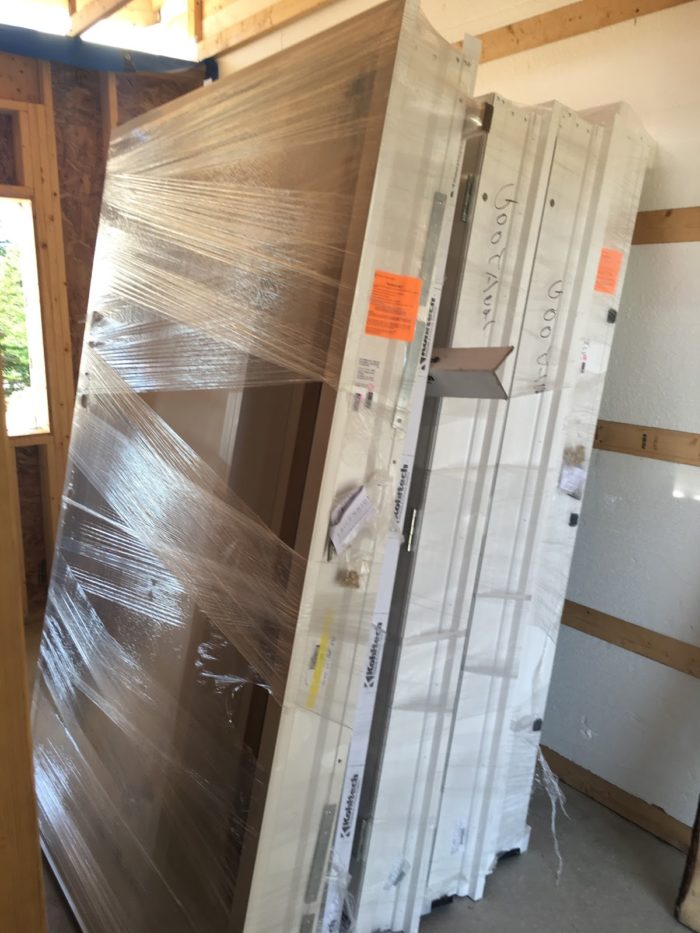
We ran a little behind on the framing stage so my windows and doors have been in storage for about a month now. They were finally delivered and we started with the installation right away.
All windows for the house are Kohltech vinyl triple-glazed windows with Energlas Plus HSG (high solar gain) glazing on the south side and LSG (low solar gain) glazng on the north. The window R-value is about 5.5. This is not your ultimate European Passive House window, but it’s not too shabby for the price.
According to the Passive House Planning Package software, the LSG windows provided a slightly better result for the calculated yearly energy demand than the HSG windows. This is not surprising since the R-value is marginally higher than HSG windows and solar heat gain is about 50% that of the HSG windows. The house is sitting about 15° off geographical south, and in the summer the sun rises slightly behind the home. The sun will cast some light into the north-facing windows in the mornings. The LSG windows will definitely help with limiting the solar gain early in the day.
I ordered my Kohltech windows with a nailing flange to make installation fairly easy. I opted to leave out the J-trim since I would be installing wood trim and siding around the windows. Kohltech provides several options for installation. The instructions for new installations specifically say that steel window clips must be used only when a window is larger than 20 square feet. That said, it appears to me these installation clips are really only effective in tension, which is only kind of useful. It seems the flange nails and sill shims do most of the work for holding the window in place. In any case, once spray foamed they won’t be going anywhere.
With this tape, practice is a big help
Having shims extend to the inside of the window frame would make it hard to seal around the window with backer rod, so we used Plygem vinyl trim cut to specific thicknesses as shims at the edge of the sill. The window was tested in the opening and the shims were cut to fit the window level. The back of the window flange at the jambs and head was caulked with silicone and the window was tilted into place once we determined that the window would fit properly.
I centered the windows in the bucks as best as possible. There were some uneven gaps along the edge of the window and buck but it should be easy to tackle them with spray foam, backer rod, and caulk. The flanges were nailed in place using 1 1/2-inch roofing nails (see Image #2 below). That photo also shows my window taping detail explained in a previous blog; this allowed me to flash the exterior of the window to the previously applied tape. Once completed, a drip cap flashing will be added to the top of the window and the water-resistive barrier (WRB) will taped to it. The WRB will extend down the sides of the window jambs and be taped to the 3M 8067 jamb flashings.
Finalizing the window flashing is fairly simple work. I have become very well versed in taping. The tape is so expensive that mistakes can become costly. I cut the flashing tape about 8 inches inches longer than the jamb or header. I take some time to roll the tape into a nice tight roll. I peel back the first couple of inches of backer and align the tape to the window so it rolls straight (see Image #3 below). I use one hand to guide the roll as I pull the paper backer. The edge of the window frame keeps the tape aligned as I unroll it. Only slight modifications need to be made as I unroll the tape to keep it straight. After the tape is unrolled, I use hand pressure to flatten the tape evenly, and then go over the tape again with a J-roller.
With the window installation complete, it’s time to move on to the door installation.
And now the doors
The doors that I ordered were pretty much the best Kohltech offers. The door frame is made of cellular PVC so there will never be any real maintenance issues. With vinyl-clad wood jambs, there’s some risk of the wood rotting over time. The door slabs are fiberglass.
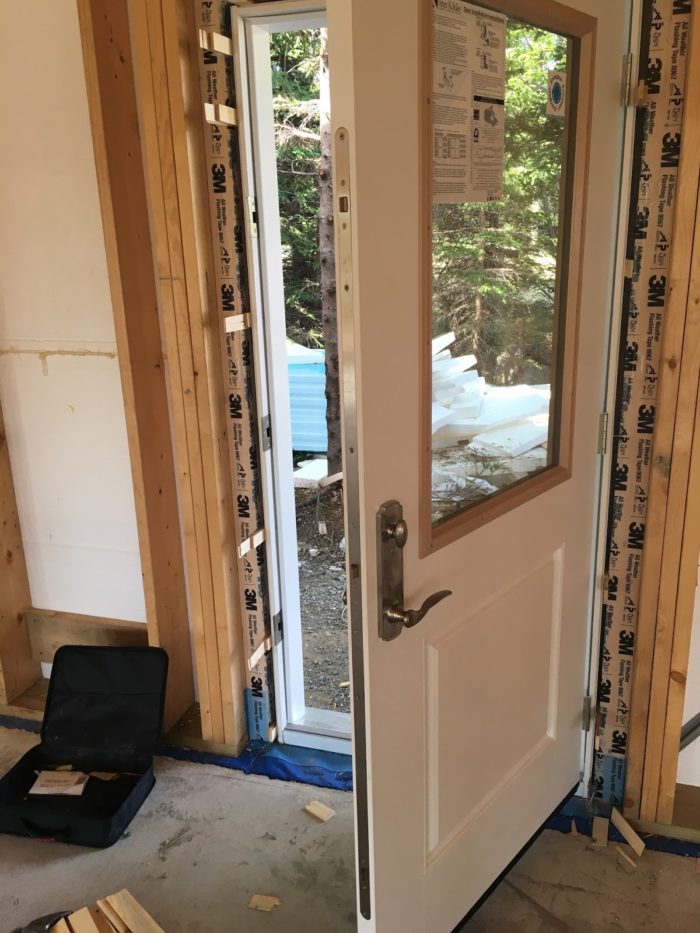
In the front of the house we opted for a half-glazed door since there are no windows in the main entry. On the porch, a half-glazed door allows some natural light to spill into the house. The south side of the house has a door with full glazing. All of the glazing on the doors is triple-glazed Energlas Plus (high solar gain on the south side, low solar gain on the north) corresponding to total door R-values of about 5. The company doesn’t really provide any information about how this is measured but I assume it’s at the center of the door since they list different U-factors depending on glazing coverage. For example a door with no glazing has an imperial U-factor of 0.16 but one with full glass has a U-factor of 0.21.
I am sure Kohltech would provide the information if I were to investigate further…. and I will investigate further. I ordered the doors with triple-point locking hardware (see Image #5 below) in hopes that minor installation issues would still allow tight-fitting seals around the doors when the triple-point lock is engaged. R-value isn’t everything. A leaky door is as good as an open one. All the R-value in the world won’t keep your house warm with an open door in the middle of winter.
Installation is straightforward
Kohltech’s instructions for door installation are fairly typical. We applied a couple of thick beads of acoustical sealant on the sill pan and 6 inches up the door jamb. From the outside we tipped the sill of the door onto the sill pan of the rough opening and centered it approximately. We then tipped the door in place so the back of the vinyl brickmold was flush with the exterior. We made further adjustments to the centering of the sill so when the jamb was level, the door box had an even spacing with the rough opening all the way around.
There is no such thing as a square rough opening so we just made sure I would have room for spray foam, backer rod, and caulking to fill any gaps. We plumbed the hinge jamb, inserted shims behind the top hinge and secured the door with a 3-inch screw through the hinge until the door frame was secure. It was apparent that overtightening would warp the PVC frame, so we made sure the shims were slightly too tight before driving a screw into the hinge.
Once the hinge side was completed, we secured the other anchoring points. The PVC frames are only somewhat straight. We used shims to even up the reveal (to about 3/16 inch) between the PVC frame and the door so it matched the hinge side. That took some time and patience.
The triple-point Trillium locksets are nice, and come preinstalled. This set is nickel-plated. There are three strikers and three latches, all of which are controlled by a single lever and a single deadbolt knob. The deadbolt is quick-release from the inside. If you need to exit quickly you need only to push the door lever downwards and it releases the deadbolt lock. As you engage the lockset deadbolt you can see the upper and lower parts of the door pull towards the weatherstripping. I am hoping this means a tighter seal and less issues the door air seal if it ever warps, since the locking mechanism will pull the door shut.
One issue with using shims is how to air seal around them. There is no real elegant solution here. You really need the shims for support, but they get in the way for air sealing. My solution is to back-cut the shims on a slight angle from the rough opening towards the door. I will spray foam and apply backer rod between the rows of shims and then caulk the face of the back-cut shim so that no air can leak through… and then I’ll cross my fingers!
Weekly Newsletter
Get building science and energy efficiency advice, plus special offers, in your inbox.


7 Comments
Doors
Malcom, The triple point hardware draws the door towards the weather stripping nicely. I agree, they arent a DIY fix if things go wrong. I had one problem with the door and had to call kohler. THey had to send a whole new mechanism. This being said, the mechanism is just mortised into the edge of the door and is simple enough to replace but most people may feel uncomfortable doing it.
SOme good points on the shimming. With this said, my blower door test was fine. However, If I were to do it again, your approach would work much better!
Doors
David, those triple-point locks make a big difference. My only beef with them is if they ever go wrong it isn't a simple DIY to fix the way normal lock sets are.
Far to late for you (although it maybe some help for your interior doors?). This is how I shim:
- All my shims are 2" strips of plywood of various widths, and a stack of laminate for minor adjustment, cut to 1" less than the jamb depth.
- Shim the rough-framing on the hinge side in five places (using a level) before putting the door into the opening. Fasten the shims with screws through the hinges and at the others where the weatherstripping will cover the heads.
- Shim the sill if necessary.
-Shim the lock side in four places, again using screws and laminate strips, and using the door edge as a guide to get an even reveal.
- Foam over the shims which should be back about 3/4" from the interior of the jamb.
- On interior doors I only use three shims each side
David
I forgot to add that I'm really enjoying your blog.
Malcom
Thanks!
Casement - Awning Windows
I have used 'double' opening, casement windows, that open 90', with the hinges in the 'centre' and also with below ' lower' awning, windows. The casements, so that they would get the maximum air in/out with the wind from 'left/right' and 'head on' ! The awning windows, so I can leave them (partially) open when I go away, and not have the risk of rain entry. Rainaway glass, was inexpensive, at $1 per square foot!
Gary Katz has the 'best' instructions/video, for entry door installation - screw placement - shim locations, etc., that I have found on the internet.
Kohler?
I think you mean Kohltech doors?
Kohler?
This is correct. The doors are distrubited through Kohler dealers and ordered with kohler specs. They are made by Kohltech in Nova Scotia and come with the Kohler label.
Log in or create an account to post a comment.
Sign up Log in