
Image Credit: All photos: David Goodyear
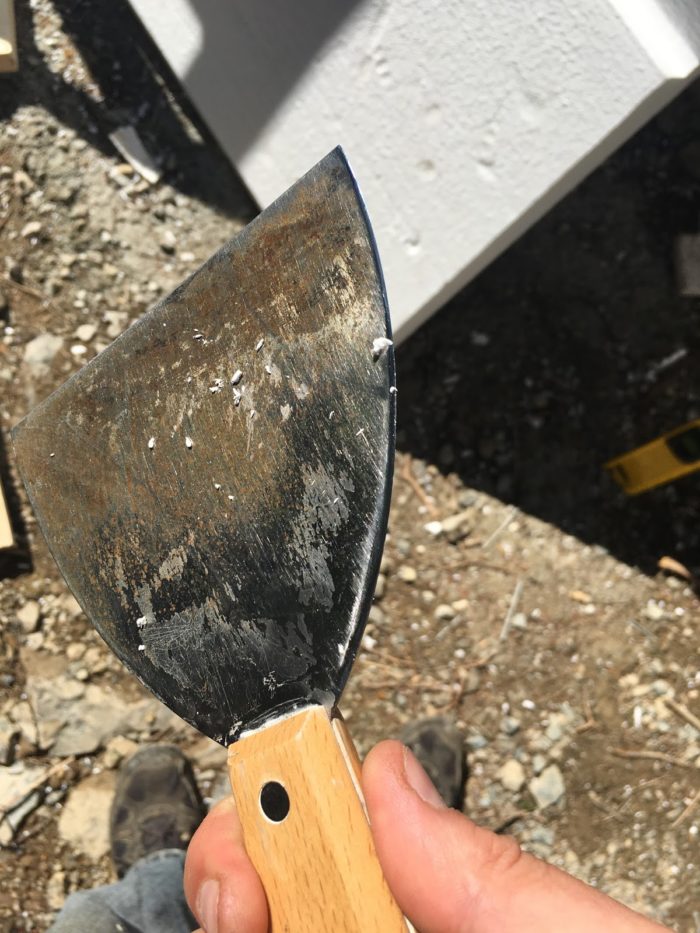
Image Credit: All photos: David Goodyear What we call a broad knife (also called a putty knife) is an ideal tool for cutting rigid foam insulation between 2 and 3 inches thick. One edge of the tool (the side) has been sharpened. The sharpened edge of the knife is stiff enough not to wander in the cut. Once the surface has been scored with the help of a straightedge, the knife will follow the line with successive passes. Work slowly. Flashing tape and acoustic caulk are used to seal the corners and any joints in the plywood window bucks. This photo also shows the self-adhering neoprene gasket used to prevent any water infiltration at the sill. A strip of Tyvek across the bottom of the window opening extends beyond the jambs and is sealed to the buck with flashing tape. A credit card (or something similar) is helpful in pressing flashing tape firmly into place. This window buck has been sealed to the exterior with 3M flashing tape around the perimeter. Corners and all joints are sealed with a combination of acoustical sealant and tape. The opening is now ready for a window. Framing details for the door rough opening are visible here: a doubled 2x4 to the interior, then a layer of foam, and finally a 2x4 on the flat. This photo also shows the aluminum sill pan that will help protect the bottom of the opening from moisture. The next layer is Blueskin, which covers the aluminum sill pan and extends about 6 inches up the jamb. A second strip of Blueskin membrane connects the sill pan to the sub-slab vapor barrier. Later, the Blueskin will be taped to the slab using primer and acoustical sealant. This photo also shows a neoprene back dam taped to the Blueskin to prevent any water from creeping under the threshold. Strips of Tyvek are stapled to outside of the door opening, and then sealed with flashing tape. Flashing tape seals the inside of the rough opening. This tape will be connected to the interior air barrier (a layer of OSB) once the wall cavities are insulated. This opening is now ready for the door.
More Guest Blogs


Editor’s Note: This is one of a series of blogs by David Goodyear describing the construction of his new home in Flatrock, Newfoundland, the first in the province built to the Passive House standard. The first installment of the GBA blog series was titled An Introduction to the Flatrock Passive House. For a list of Goodyear’s earlier blogs on this site, see the “Related Articles” sidebar below; you’ll find his complete blog here.
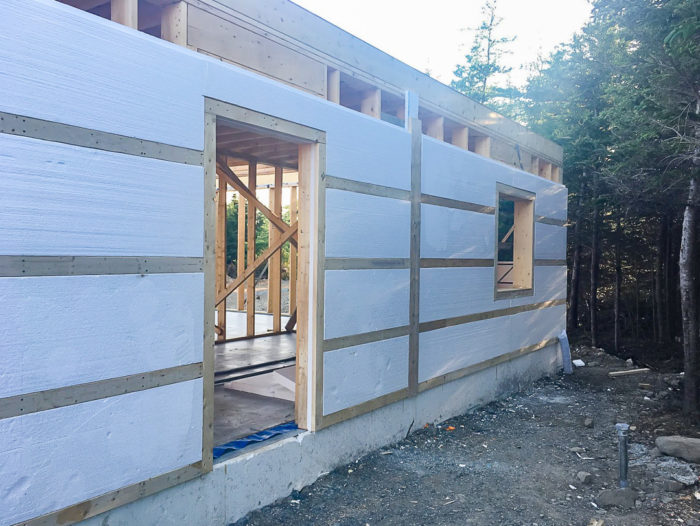
We bought hemlock beams and posts from Nova Scotia because they weren’t available locally. Placing them was the end of a major milestone for the build — and the beginning of another! It was time to start sheathing the exterior with rigid foam.
The rigid foam used on the outside of the walls is called Truewall, a Type I EPS foam that comes with slots for strapping. It is usually purchased with a thickness of less than 3 inches, which can accommodate 1×3 strapping, but it can be manufactured to meet any specifications. In our case, we wanted 3-inch-thick foam with slots for 2×4 strapping every 24 inches.
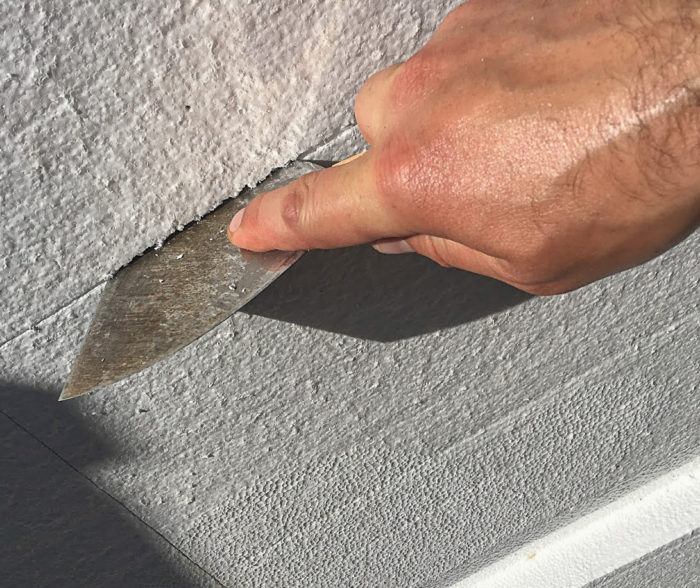
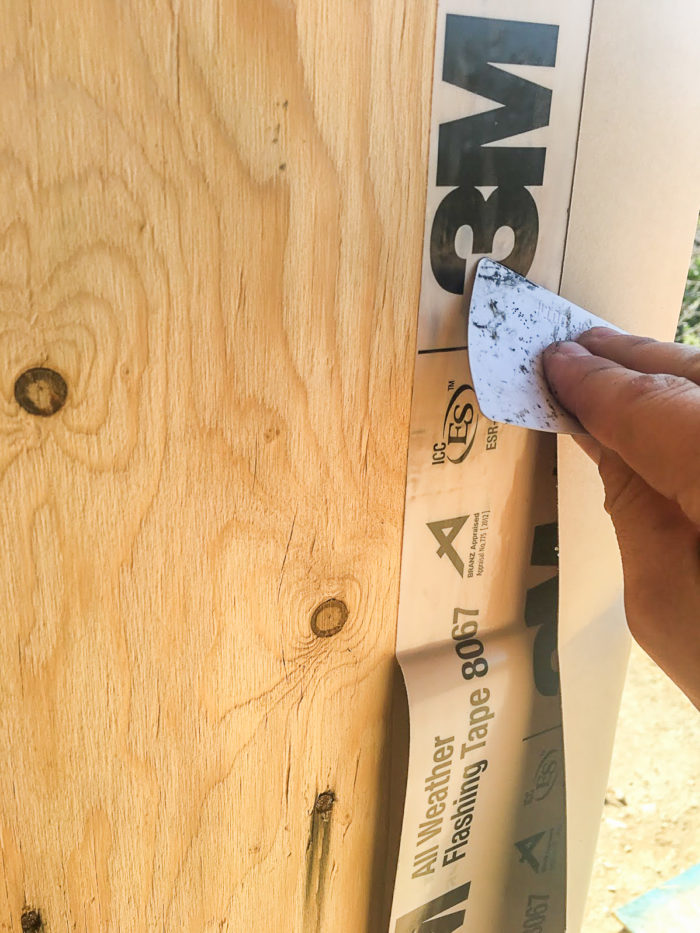
I have tried several ways to cut foam. Depending on thickness, different methods work better than others. For thin foam, say 1 inch or less, I like using a utility knife. The blades are sharp, and you can work quickly with a straightedge. If the foam is greater than 1 inch thick, I find that a utility blade wanders. For really thick foam, 4 inches and up, a small, fine-toothed, handsaw works great. For foam between 2 and 3 inches thick, I find a broad knife (a putty knife) with the side of the blade parallel to the handle sharpened to a razor’s edge works the best (see Images #2 and #3, below).
You can use a straight piece of 2×4 lumber to guide the broad knife. Once the cut is scored part way through, the score will guide successive cuts without a straightedge as long as you work slowly.
Typical detailing makes for a leaky exterior
Ensuring that a building is airtight involves some planning — well, actually, a lot of planning! I’ve learned that the barrier needs to be defined incrementally as stages of construction are being completed. With a cross section of your building you should be able to start at some point on the building’s interior (if the air barrier is defined there) and follow the air barrier with a pen, around the floor, walls, windows, ceilings and eventually back to the point where you began, without lifting your pen from the paper. You really need to think about how the air barrier will make transitions from one plane to another as it wraps around the building.
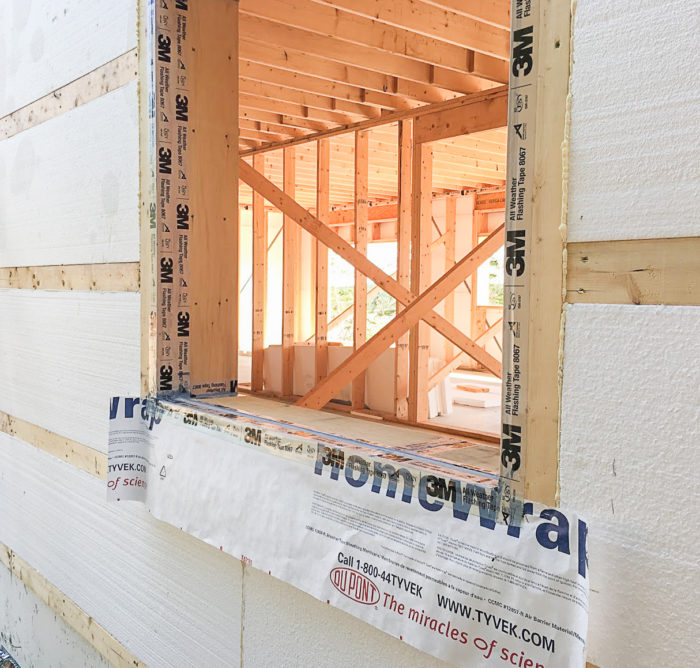
One of those areas is at the windows. The windows themselves are part of the air barrier. However, they need to be tied into rest of the barrier. We defined the air barrier at the interior of the walls: OSB with acoustical sealant at joints and further sealed with 3M-8067 tape. The window bucks will be tape-sealed to the OSB. This change in plane for the air barrier makes the inside of the buck the airtight barrier; so the windows need to seal against the interior.
I have seen many builders assume that the exterior water-resistive barrier (WRB) is an air barrier — and I guess in some cases, you could make it one. But with all the penetrations with nails, staples, and electrical, I really can’t see how it could be airtight. Builders here typically use Tyvek to flash their window openings. The Tyvek is wrapped around the building and cut diagonally and wrapped to the interior sills, jambs, and headers of the window openings to form flashings.
When spray foam is applied, it often ends up often between the Tyvek and the window, which would allow a lot of air leakage between the framing members and the Tyvek. None of the corners of the window opening are caulked or sealed in any way and are not typically tied into the interior vapor barrier. This makes for a very leaky structure. Using a solid buck with caulking at the corners and proper tape sealing makes the most sense.
Sealing the window bucks
It’s important to get a good air seal against the buck while also flashing the window properly. Since the window drawings in my plans are cross-sectional, the details are hard to visualize. It took me some time to map out my process. Here’s what I did.
For inside corners:
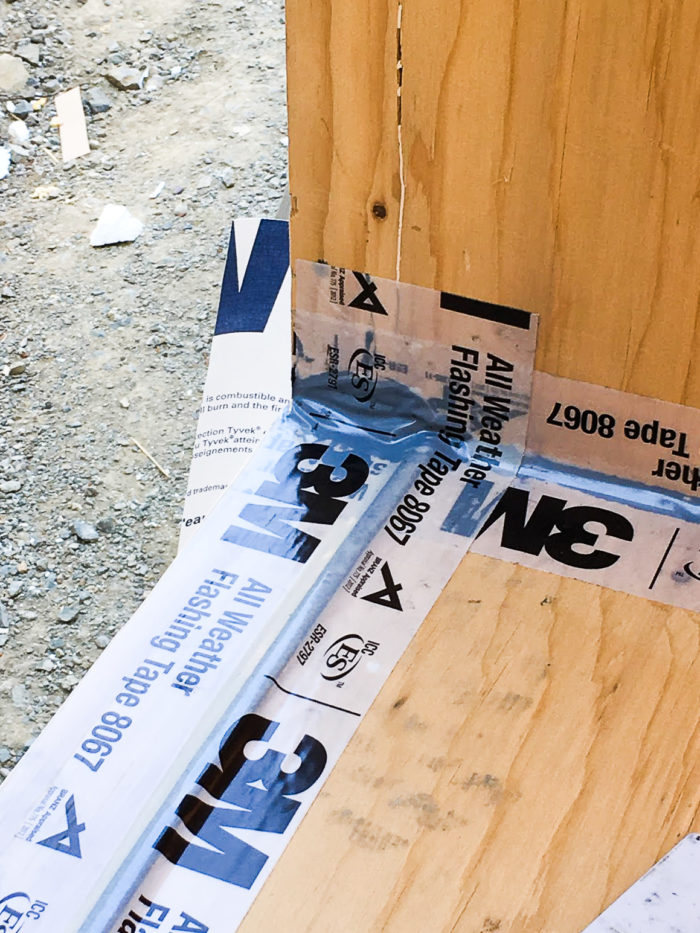
(1) Caulk all corners and joints in the plywood buck with acoustical sealant.
(2) Cut strips of tape the same length as the depth of the buck.
(3) Using 4-inch-wide 3M tape, peel off one side of the split paper backing. Fold the tape and stick to one plane of the buck close to the corner.
(4) Peel off half of the paper backing for the remaining half of the tape and use a credit card or something similar to roll the tape slowly into acoustical sealant in the corner of the buck.
(5) Use the card to smooth out tape with light pressure making sure to work outwards to smooth out veins that can form by uneven tape.
(6) Once the joints are complete, I roll them with a J-roller to ensure good contact between the tape and the wood buck. (You can see these details in Image #4.)
Now you have good airtight joints at the corners of the buck!
Adding a back dam
Most window manufacturers require some sort of sloped drainage plane at the sill of the window. I have seen this done with a piece of clapboard on the sill. The big issue here is that you need the buck to be airtight but you also need to flash it to the exterior. If you use clapboard it involves another step of making the clapboard airtight to the buck.
My plans called for a back dam on all window openings. This is easy to do. I mark a line with a pencil, about 3 1/4 inches back from the outside edge of the buck to define the inside edge of my back dam material. I picked up some 1/4-inch thick (3/8 inches wide) self-adhering neoprene gasket material for this. Starting at one bottom corner of the buck I tape the gasket in place using my guide line.
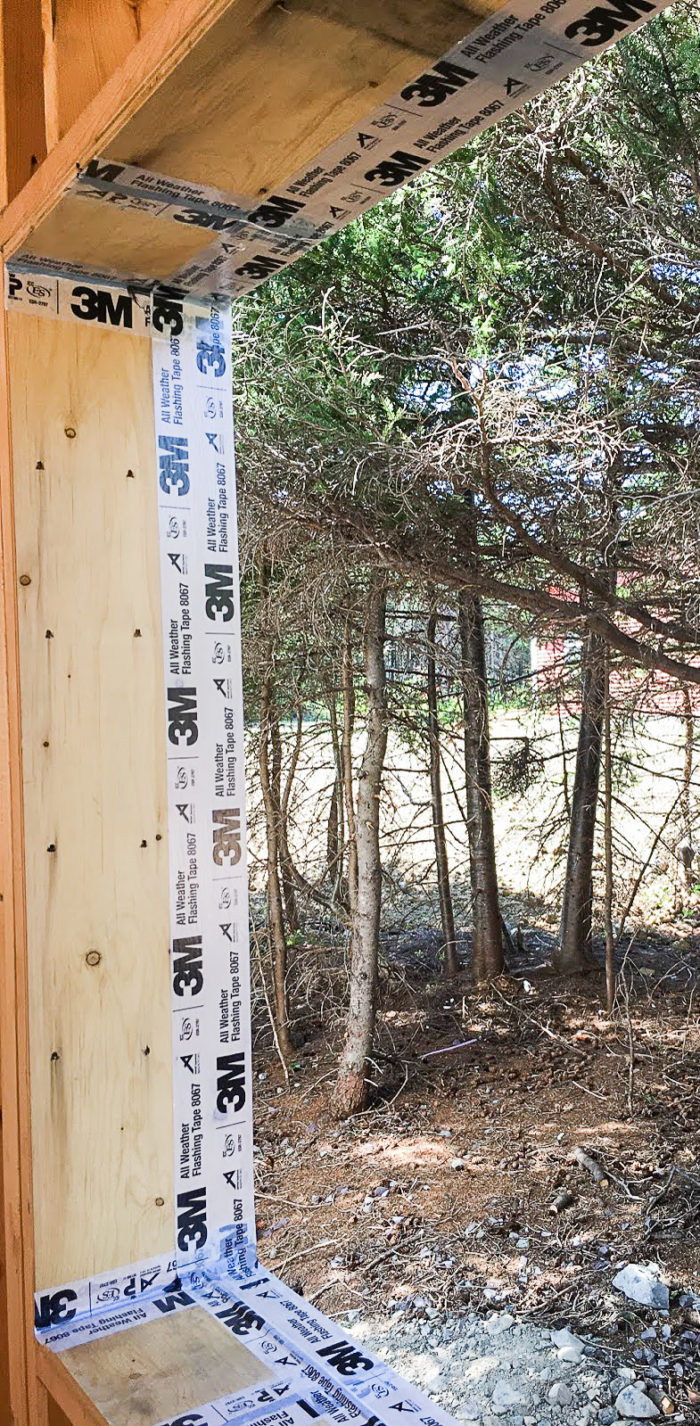
To ensure the taping detail will flash the window to the exterior Tyvek (when it gets applied), I staple a 12-inch piece of Tyvek flush to the top of the buck sill and out 8 inches beyond the edge of the jambs (see Image #5, below).
Now comes the tape flashing detail which will also provide an airtight seal to the buck:
(1) Precut pieces of flashing tape (6 inches of 3M-8067) 5 to 6 inches longer than the sill in order to make a pan flashing.
(2) Place a small bead of acoustical sealant at the inside bottom corners of the buck.
(3) Peel off about 2 to 3 inches of backer for the part of the tape to be stuck to the sill interior and use a credit card to work the tape into the corner.
(4) As I peel off the backer I am constantly looking to see that the tape is going straight and I lightly stick the tape to the outside edge of the buck.
(5) Once I get to the other corner, I use my card to work the tape into the acoustical sealant and then back up the jamb.
(6) Using the card, slowly work the tape around the back dam material. As long as you haven’t applied any pressure, the tape will reposition a little.
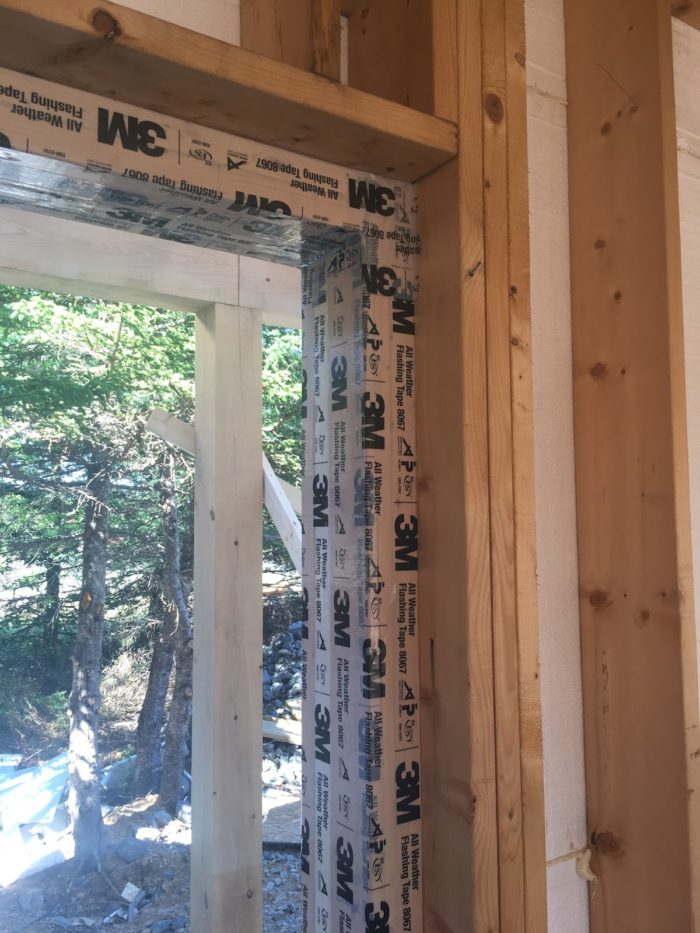
I use a similar procedure for the jambs and header.
(1) Caulk seal the corners again. I fold my tape along the split backing line and stick as I pull off the backing. At the head of the jamb, the tape has to be cut at the corner and wraps to the exterior header.
(2) Work the tape downwards using the card (see Image #6).
(3) Once I reach a corner, I work the tape into the bead of acoustical sealant.
(4) When the interior of the jamb as been tape-sealed, I simultaneously pull the paper backing off at the exterior while I wrap the tape to the exterior 2x4s of the building.
When the windows go in, they will be caulked along the back edge of the nailing fin at the jambs and header with exterior silicone caulk. More 3M tape will seal the nailing flange to the tape already in place. An aluminum end dam flashing will be added to the top of each window and the WRB (Tyvek) will tape directly to tape used as the final flashing detail on the nailing fin for a completely flashed opening.
Door openings
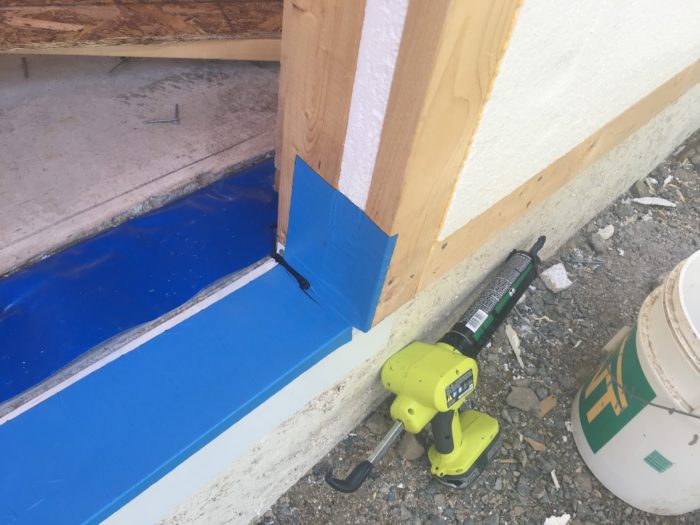
It took us a while to wrap our heads around the door details on my plans. The main exterior wall is composed of 2x8s. The rough opening is substantially larger than the door. Because the walls are much deeper than a standard door frame for a 2×6 wall, the interior of the 2×8 opening was studded with double 2x4s. Outside of these 2x4s, there is 1 1/2 inches of foam and another 2×4 on the flat which brings the door frame opening flush to the exterior 3 inches of EPS foam (these framing details are visible in image #8 below). The brickmold of the door will sit against the exterior of the wall. The ganged 2x4s which define the opening will allow the door to open a little further than that of a 2×8 wall.
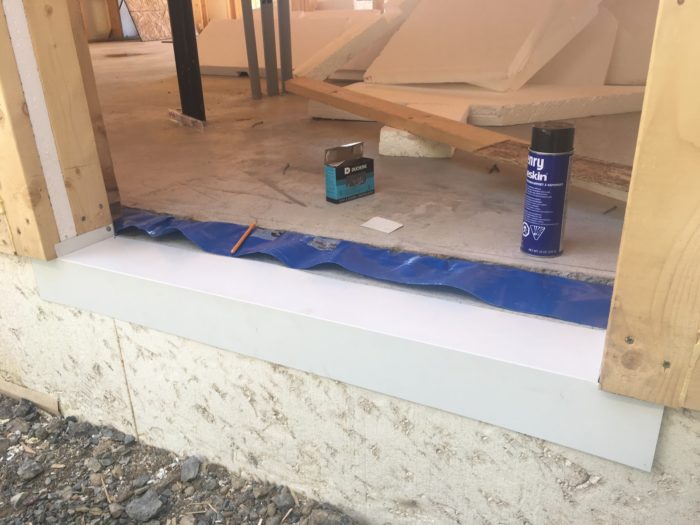
With the door details finalized, I had to flash the opening according to the plan. The sill pans have a kind of end dam to prevent water from entering under the stud opening should the door ever leak (Image #8, below). After verifying that the concrete sill was level, I installed the aluminum sill by sliding it into place and securing it with a single roofing nail in the back of the end dam.
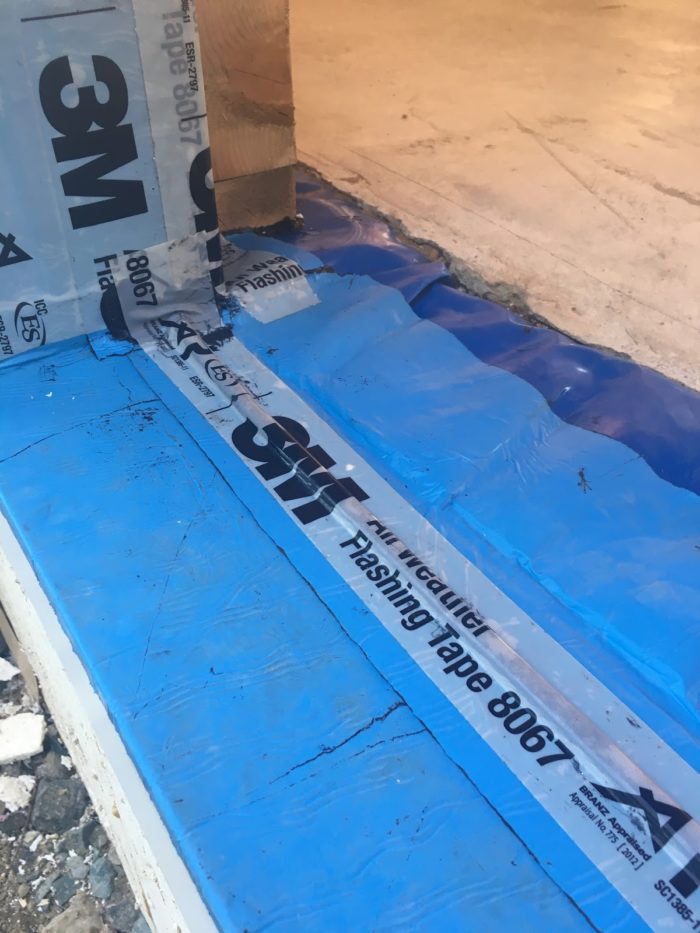
I used Blueskin, a self-adhering membrane, to form a sill pan (see Image #9, below). It was cut long enough to run 6 inches up the jamb on each side. Before sticking it in place I primed the surfaces with Henry Spray Primer. Finally, another piece of Blueskin was applied to the pan and extended onto the vapor barrier (see Image #10, below).
I primed all of the surfaces before applying the membrane. Once the details are complete (to be described in a future post), the Blueskin will extend all the way to the slab. To ensure a good seal in the corners and along the length of the joint between the Blueskin pieces I used a bead of acoustical sealant. Image #10 below shows a simple neoprene back dam that will prevent water from entering the house should the door leak.
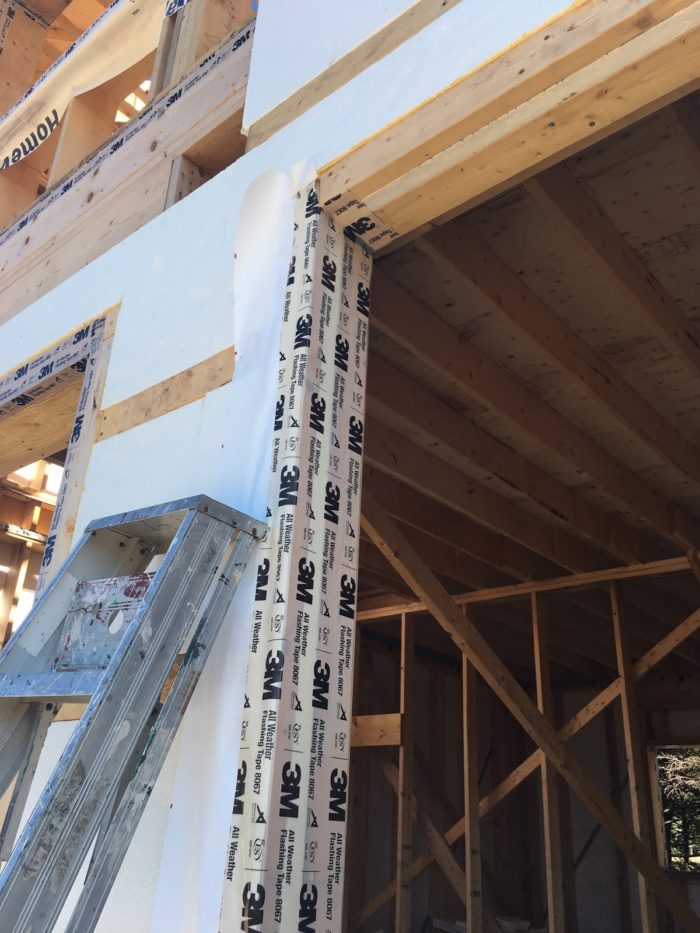
Before commencing the flashing detail, 8-inch-wide pieces of Tyvek were attached to the outer jambs with staples (Image #11, below). The tape used at the jambs was the same 3M-8067 that I have used elsewhere but is 9 inches wide; 2 inches of tape wraps to the exterior and onto the Tyvek and the rest is stuck to the jamb.
After the jambs, the header tape is applied. After this is completed, the taping detail is wrapped to the interior 2x4s as shown in Image #12 below. At this time, the doors are ready for installation. After the doors are installed (the doors have brickmold exterior casing), end dam cap flashing will be added to the header of the door and then Tyvek will be adhered to the top for a completely flashed opening.
Overall, I am pleased with the way the details turned out. Bring on the doors!
Weekly Newsletter
Get building science and energy efficiency advice, plus special offers, in your inbox.


4 Comments
Wow! I never seen taping look that professional.
A+
taping details
Hi John,
Thanks! It took some time to get used to taping certain details and working with the tape. The tape has a split backing which can be a pain or a blessing depending on the situation and how you use it. I have at least 5 different methods for using the tape depending on the situation. After applying some 4000 linear feet of tape I can now do it, for the most part, without any wrinkles! The occasional one still rears its ugly head....
Great Attention to Details
That is not your typical construction methodology that you see today. The great attention to details is something to behold. 90% of the homes being built today is just slam and go, details be dammed. Only a good GC or an active homeowner will pay attention to the details like this.
When I built my home I spent over a hundred hours doing all the detail work on transitions, window openings, wall to roof connections, etc. I ended up using SIGA Tapes which are amazing and will last the life of the home.
Doing it right the first time and it will last a lifetime! Great build and keep us posted on the build.
Great attention to details
Hi Peter, you're right, very few contractors would complete such details. It's amazing really. The details will make or break a building yet get ignored or overlooked. Later and there's more to come!
Log in or create an account to post a comment.
Sign up Log in